How to: Chemical Elements Timeline
Find out how we made our Timeline of Chemical Element Discoveries, so you too can create a stunning timeline just like it
17th March 2023 | Timeline Editors
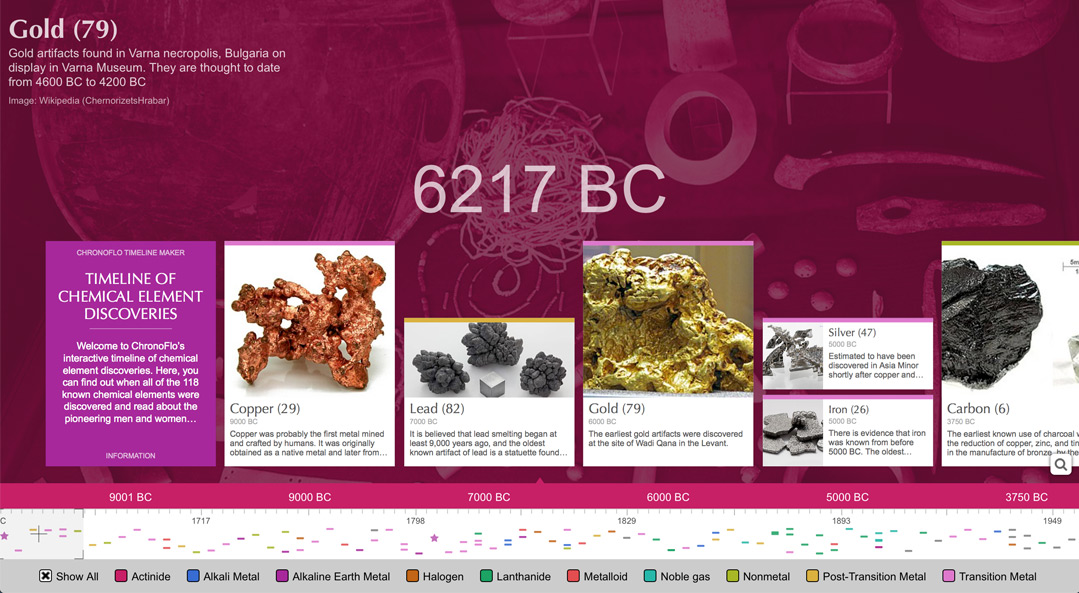
Sharp-eyed readers might have spotted a new timeline design that has recently popped up on our home page and in our list of timeline templates. The new design - which allows you to arrange event panels in neatly alligned stacks based on an event's year or month - has been used by our editors to create a stunning Timeline of Chemical Element Discoveries.
Since we published this timeline on our website, a number of ChronoFlo Timeline Maker users have got in touch to ask how we created the timeline. Because the process for creating the timeline is a bit more complicated than with most of our timeline designs, we have decided to publish a specific tutorial for it.
By following the below instructions you too will be able to create an amazing interactive experience just like our Chemical Element Timeline. Let's get started!
How to create the timeline
1 Sign into your ChronoFlo Timeline Maker account, and create a new timeline with the Standard layout.
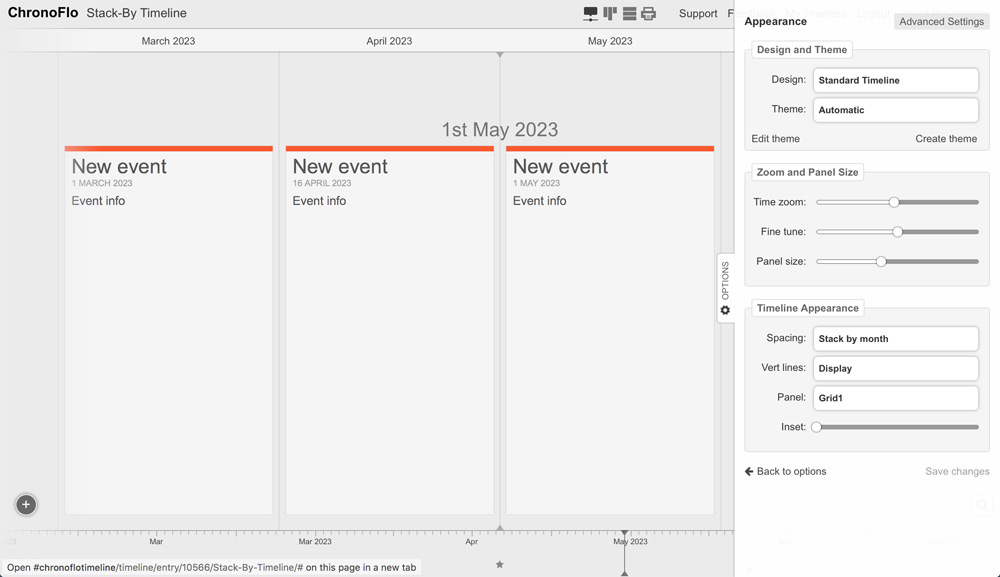
2 Open the "appearance" tab in the Options panel and drag the inset slider to the left. This will ensure your timeline takes up the full browser window.
3 Next, while still in the "appearance" tab, change the Spacing option to one of the "Stack by" options. This will arrange events of the same year, month or day (depending on the Stack-by option you chose) in neat, nicely alligned stacks.
4 Now create a few events for your timeline by clicking on the "+" button at the bottom left of your timeline. Don't worry about how the events look at the moment, though it is advised to give some of them images. If you used the Stack-by-Year option above, make sure that some of the events have different years. Similarly, if you went for the Stack-by-Month option, ensure some of the events have different months.
5 Once you have created a handful of events, open the "appearance" tab in the Options panel again, and set the Panel option to "Grid1" - it's right near the bottom of the drop down menu. The Panel option allows you to choose from multiple panel designs for your events. The Grid1 option works very well with the Stack-by spacing option.
6 The next step is to play around with the zoom and panel size options so that there is space for each of the stacks to fit at the base of the timeline. You can change the timeline zoom and panel size via the "appearance" tab. Use the Fine tune option, to more precisely change the time zoom. Your timeline should now look something like what we have in Figure 1.

Figure 1. The timeline after we have adjusted the zoom and panel size to ensure the event panels fit nicely next to each other
7 By default, panel designs appear as tall as they can in the space available. And the Grid1 panel can be very tall. So let's make them a bit smaller by choosing the format for the panel by editing the event and choosing from the format drop down menu. The format sets whether a panel design should be shown in a "very large", "large", "medium" or "small" format. Choose the "large" option for some of your events, the "medium" for others, and one or two of them the "small". It can be visually attractive to have panels of different heights, and the "small" formats are useful when you have multiple events stacked on top of one another.
8 At this stage, you may want to add a few more events, to fill out the timeline a bit.
9 Next we are going to add some categories to the timeline. Categories are very powerful in ChronoFlo Timeline Maker - they allow you to set the panel design, format and colors for a group of events. Rather than having to individually color or design each event, you create a category, set the panel design and colors for that category, and then whenever an event is assigned to that category it will take on that design and color scheme.
10 Create your first category by selecting the "category" option from the Options panel. Name your category and set a color for the category's accent color. Now assign one of your events to this category. Note how the line at the top of the panel changes to the category's accent color. You can actually use categories to change the entire color scheme for a panel but that is for another article.
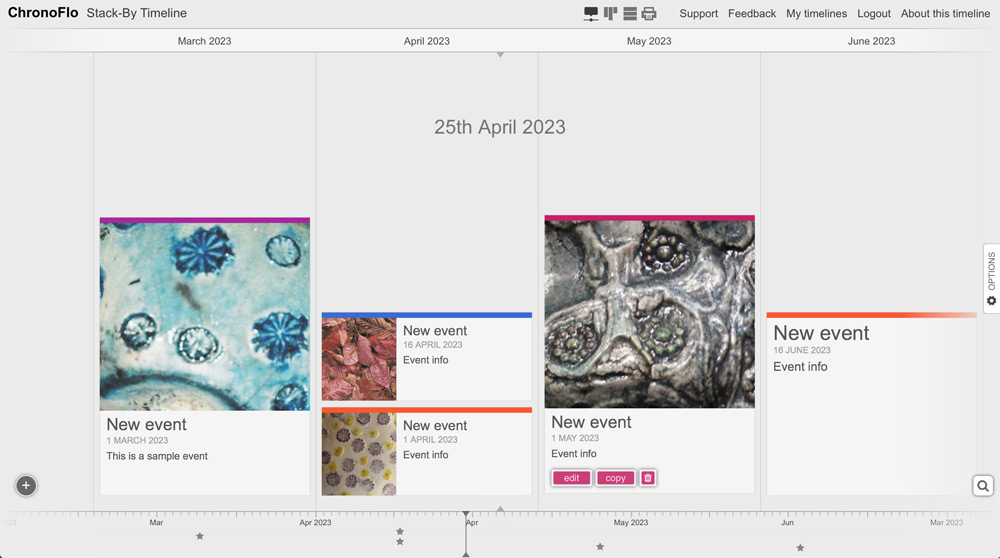
11 Add some more categories and assign events to the appropriate one. Your timeline should now look something like figure 2.

Figure 2. Note that the events use different colors for the bar at the top of the panel. This was achieved using ChronoFlo Timeline Maker's powerful categories functionality
12 It might be nice to have the categories displayed under the timeline. You can do this by opening the "Timeline settings" tab in the options panel. Set the Categories drop down to "Display below timeline". You can now click on the categories to show and hide events of a particular category.
13 Your timeline is now perfectly useable, and you could quite easily just continue adding more events until you have finished it. But it is a little boring looking. The color scheme is not ideal. This is where ChronoFlo Timeline Maker's themes show their worth. You can create your own theme and change the colors of virtually every part of the timeline. First of all, you may want to check out some of the pre-built themes ChronoFlo offers, such as The Darkness, Mellow Yellow or Pure White. You can do this, once again, from the "appearance" tab in the options panel.
14 If none of the themes perfectly meet your needs, you should select the one that is closest, and then create your own custom theme based on that theme. In the case of the Chemical Element Timeline, we used Pure White for the basis of our custom theme. You can create your own theme from the "appearance" tab or by clicking on the "theme" option in the Options panel.
15 The Chemical Elements timeline features an interesting colored date line. To achieve something like that on your timeline, you should choose a color for the Timeline Scale->Sub-back color. You may also want to change the Timeline Scale->Subtext color to work with the sub-back color. Play around with some of the other color options to achieve the color scheme you want. Note that the Timeline Navigation->Border color is used to color the background of the category filter at the bottom of the timeline.
You can also choose a background image and color for your theme. We recommend using a theme's image color and image overlay to colorise the background image - an image of a single color often provides a better less-cluttered backdrop to a timeline's events than does a full-color image.
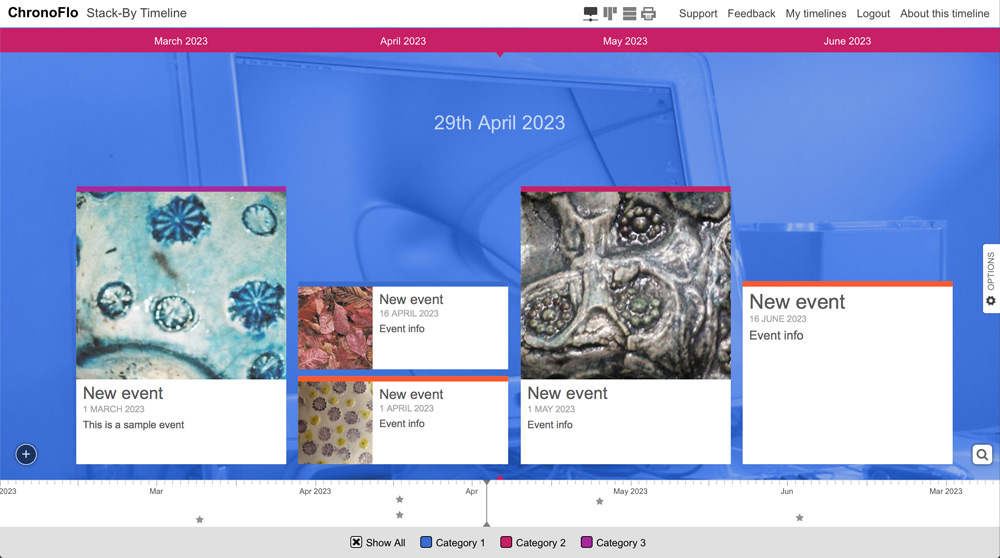
16 Once you have your custom theme as you want, save it and make sure you assign it to your timeline. There are a couple of other tweaks you might want to make. In the "appearance" tab, set the Date line option to "hide". Then in the "Timeline Settings" tab, set the Edge fade option in the Quality Settings to "Disabled". Your timeline might now look something like Figure 3.

Figure 3
17 Keen eyed readers might have noticed that in the Chemical Element timeline, the red date band is along the top while in our timeline, it is at the bottom. To move the date band to the bottom of the timeline, we need to create a custom timeline design. ChronoFlo's timeline design functionality allows you to customise the look and layout of your timeline, and is a very powerful feature that deserves its own article.
For now, we are just going to look at how you can move the date line down. Firstly, in the Options panel, click on the "More options..." link at the bottom, to open up the second page of options. Now select the "timeline design" option and create a custom timeline design based on the Standard design. Name your design and assign it to your timeline.
Next, drag the Timeline scale->Position option to the far right. Voila, the date line is now positioned at the bottom, just as with the Chemical Element Timeline. You may also want to set the Timeline scale-Top bar option to "Hide", and play around with the Selected date options.
18 Your timeline design is almost done. The ony thing to do now is use our Spans functionality - see the "spans" option on the second page of options in the Options panel - to set different images and background colors for different times. But, as this tutorial has already dragged on a bit, we'll leave that as an exercise for the reader.
We hope you found this tutorial useful. To keep up to date with the latest ChronoFlo Timeline Maker news and developments, you can follow us on Twitter and Facebook. If you have any questions about our software, please email us at hello@chronoflotimeline.com.
